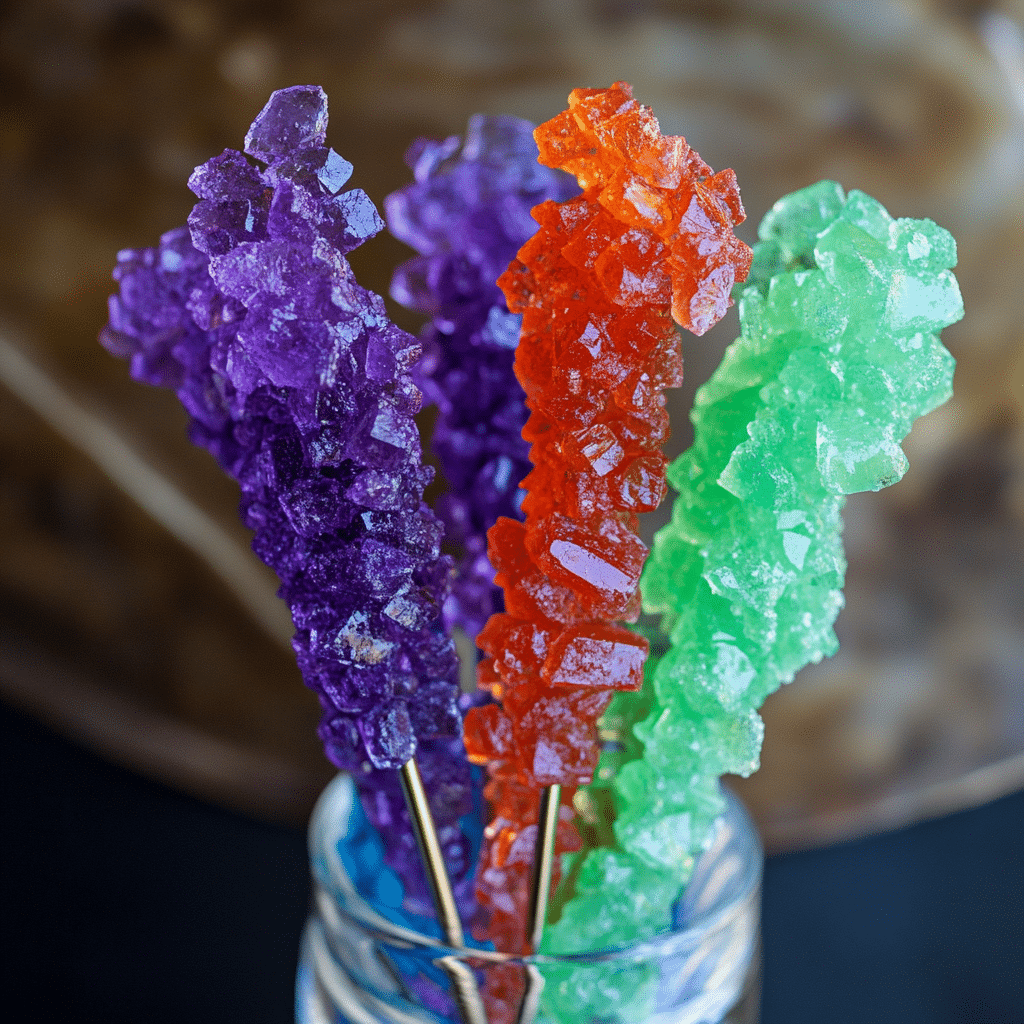
Making candy at home isn’t just for pros it’s a fun, flavorful, and surprisingly easy project anyone can enjoy. Among all the sweets you can create in your own kitchen, rock candy stands out as a blend of kitchen science, creativity, and nostalgia. In this complete guide, we’ll walk you through how to make classic and magic rock candy that sparkles, tastes amazing, and makes a perfect gift or treat. Whether you’re a parent looking for a fun weekend activity, a party planner in need of creative favors, or just a sugar-loving DIY-er, this rock candy recipe guide has something for everyone.
Table of Contents
Table of Contents
1. What is Rock Candy and Why It’s Still So Popular
What is Rock Candy?
Rock candy is a type of confection made from large sugar crystals that slowly form over time as a saturated sugar solution cools and evaporates. Unlike most candies that are boiled to reach a certain stage, rock candy forms naturally, thanks to basic science and a bit of patience. It’s pure, crunchy sugar in its most dramatic and sparkly form.
You might remember buying brightly colored sticks of rock candy from fairs or candy shops. The cool thing? You can easily replicatea nd even improve them at home with just a few ingredients.
Why People Love Making Homemade Rock Candy Today
There are plenty of reasons this treat has stood the test of time:
- Fun and Educational: Making rock candy doubles as a science experiment, showing how crystals grow.
- Budget-Friendly: The ingredients are simple mostly just sugar and water.
- Creative Freedom: You can customize colors, flavors, and shapes for any event or mood.
- Great for Gifting: With just a ribbon and a jar, you have a stunning homemade present.
Homemade candy has seen a resurgence in popularity thanks to its simplicity and hands-on appeal. Whether you’re looking to teach kids some kitchen science or want to surprise someone with a sweet handmade gift, this candy never goes out of style.
2. Essential Ingredients for a Classic Recipe Rock Candy
The Key Ingredients You Need
You don’t need a pantry full of complicated items to make rock candy. In fact, this recipe’s simplicity is what makes it so charming and so accessible. Here’s a list of what you’ll need:
| Ingredient | Purpose |
|---|---|
| Granulated Sugar | The base of your crystals—use white sugar for best results |
| Water | Helps dissolve the sugar to create a supersaturated solution |
| Food Coloring (optional) | Adds vibrant colors to your crystals |
| Flavoring Extracts (optional) | Create unique tastes like cherry, mint, or cotton candy |
| Wooden Skewers or Strings | The surface where crystals will form |
To make magic rock candy, we’ll also look into edible glitter or glowing food coloring, which we’ll explain more about in Part 5.
The sugar-to-water ratio is the foundation of your recipe. A standard starting point is 2.5 to 3 cups of sugar per 1 cup of water. You’ll dissolve the sugar over heat until you hit the saturation point a step we’ll break down fully in Part 4.
What Makes Sugar Crystals Grow: The Science of Candy Rock
The growth of rock candy isn’t magic it’s chemistry. As you heat sugar and dissolve it in water, the liquid becomes supersaturated. That means it holds more sugar than it normally could at room temperature.
As the solution cools and slowly evaporates, the excess sugar forms solid crystals on whatever surface it can cling to like your skewer or string. These crystals grow over days, stacking into beautiful, jagged shapes that look like gemstones.
The slower the cooling process, the larger and cleaner the sugar crystals. That’s why rock candy can’t be rushed. You’re not just making candy you’re growing it.
Looking for a fresh rercipes after all that richness? Try our Homemade Hard Candy Recipe.
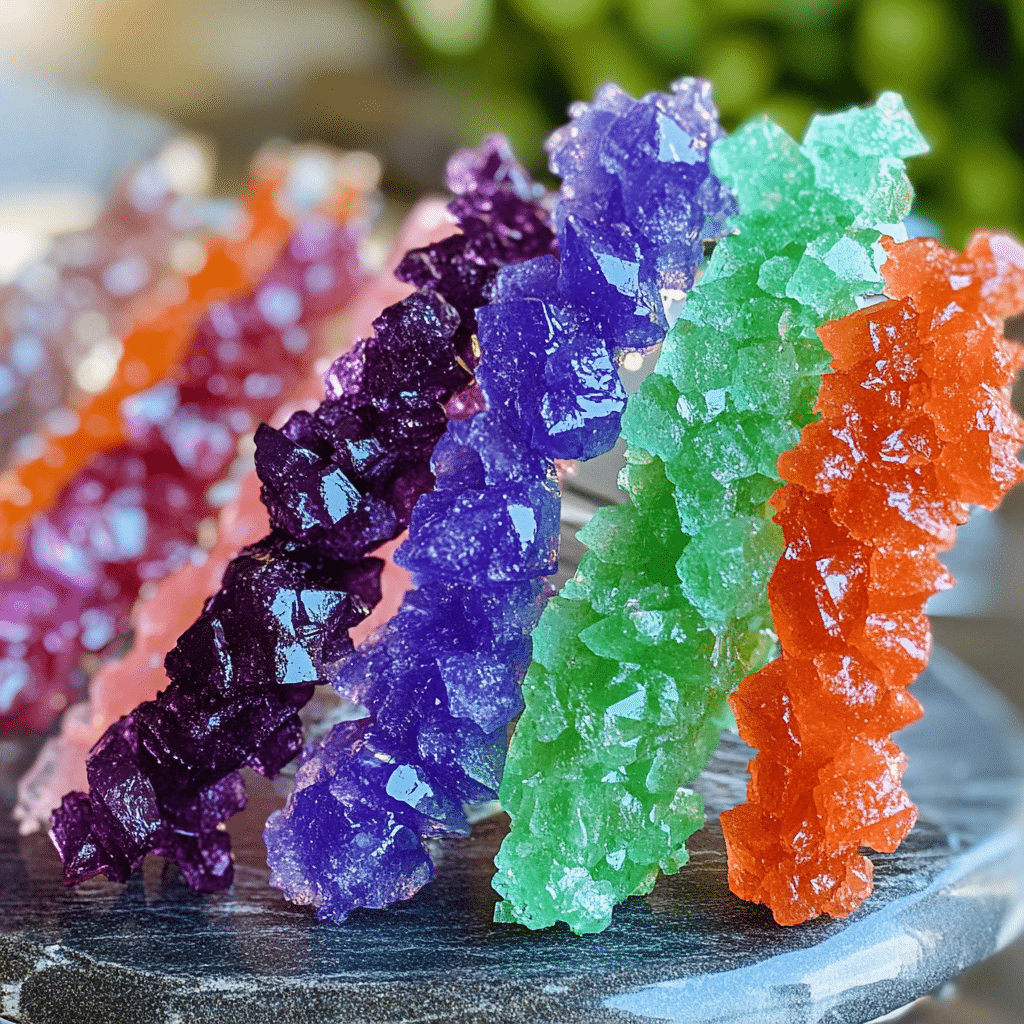
3. Tools and Equipment You’ll Need to Make Rock Candy
Must-Have Kitchen Tools for Rock Candy Recipes
Though the ingredient list is short, using the right tools makes a big difference in the success of your rock candy. Here are the basics you’ll want on hand:
- Medium Saucepan: For heating the sugar-water mixture.
- Measuring Cups & Spoons: Accuracy is key for saturation.
- Heat-Resistant Glass Jars or Tall Cups: These serve as the growing environment for your crystals.
- Wooden Skewers or Cotton String: Your sugar crystals need a surface to cling to.
- Clothespins or Clips: Used to suspend your sticks or strings inside the jar without touching the bottom.
- Funnel (optional): Helps avoid spills when pouring hot syrup into containers.
- Thermometer (optional): Great for checking when sugar is fully dissolved (not mandatory but helpful).
Best Containers and Sticks for Crystal Formation
The container’s shape and material affect how your rock candy grows. Tall, narrow, clear glass jars are ideal because:
- They allow for vertical growth
- You can easily monitor crystal development
- Glass retains heat evenly, which helps slow down cooling
As for the crystal-growing base, wooden sticks tend to work better than string if you’re aiming for thicker, uniform rock candy. Pre-dipping the sticks in sugar solution and letting them dry can give your crystals a head start.
If you prefer the classic cotton string look, tie it to a pencil and suspend it in the center of the jar just ensure the string doesn’t touch the bottom or sides.
4. Step-by-Step Recipe Rock Candy Instructions
Preparing the Sugar Solution Properly
The most important part of this recipe is getting your supersaturated sugar solution just right. Here’s how to do it, step by step:
- Combine sugar and water in a medium saucepan at a ratio of 3 cups of sugar per 1 cup of water.
- Heat on medium and stir continuously until the sugar fully dissolves. You want the liquid to turn clear—this may take 10–15 minutes.
- Once fully dissolved, continue to heat gently for another 5 minutes, but do not let the mixture boil.
- Optional: Add color and flavor once the heat is off. Use 2–3 drops of food coloring and ½ tsp of flavor extract per cup of liquid.
- Allow the mixture to cool slightly (about 5–10 minutes) before pouring into jars.
| Quantity | Ingredient | Notes |
|---|---|---|
| 3 cups | Granulated Sugar | White, fine sugar dissolves best |
| 1 cup | Water | Room temperature to start |
| Few drops | Food Coloring | Choose vibrant colors |
| ½ tsp | Flavor Extract | Peppermint, cherry, or cotton candy are popular |
How to Grow Perfect Sugar Crystals at Home
Now that your syrup is ready, let’s grow those sparkling sugar formations:
- Prepare your sticks or strings: Dip them in water, roll them in dry sugar, and let dry for at least 30 minutes. This forms “seed crystals.”
- Pour syrup into jars using a funnel. Leave about 2 inches at the top.
- Suspend sticks or strings in the center of each jar using clothespins, making sure they don’t touch the bottom or sides.
- Place the jars in a cool, dry location no sunlight or shaking. Cover loosely with paper towels to prevent dust.
- Wait and observe: Within 24 hours, you should see crystals begin to form. Let them grow undisturbed for 5–7 days.
- Once your rock candy is as big as you like, remove the stick, let it drip dry, and then place it on parchment paper to finish drying.
5. How to Make Magic Rock Candy (Colorful, Flavored & Fun)
Creating Vibrant Colored Rock Candy Using Food Dye
Making magic rock candy is all about color, sparkle, and visual wow-factor. The good news? It only takes a few tweaks to your base recipe to turn plain sugar crystals into a rainbow of candy magic.
Here’s how to elevate your rock candy with vivid hues:
- Use gel-based food coloring for intense, rich tones (a little goes a long way)
- For layered rock candy, add one color per batch and alternate sticks between jars
- Try two-tone crystals by starting in one color and switching jars halfway through growing
For glow-in-the-dark effects, use tonic water (contains quinine) and a blacklight—it’s safe, fun, and absolutely magical for parties.
| Color | Flavor Pairing Idea |
|---|---|
| Red | Cherry, Cinnamon |
| Blue | Blue Raspberry, Vanilla |
| Purple | Grape, Lavender |
| Green | Lime, Sour Apple |
Flavoring Your Rock Candy with Natural or Fruity Flavors
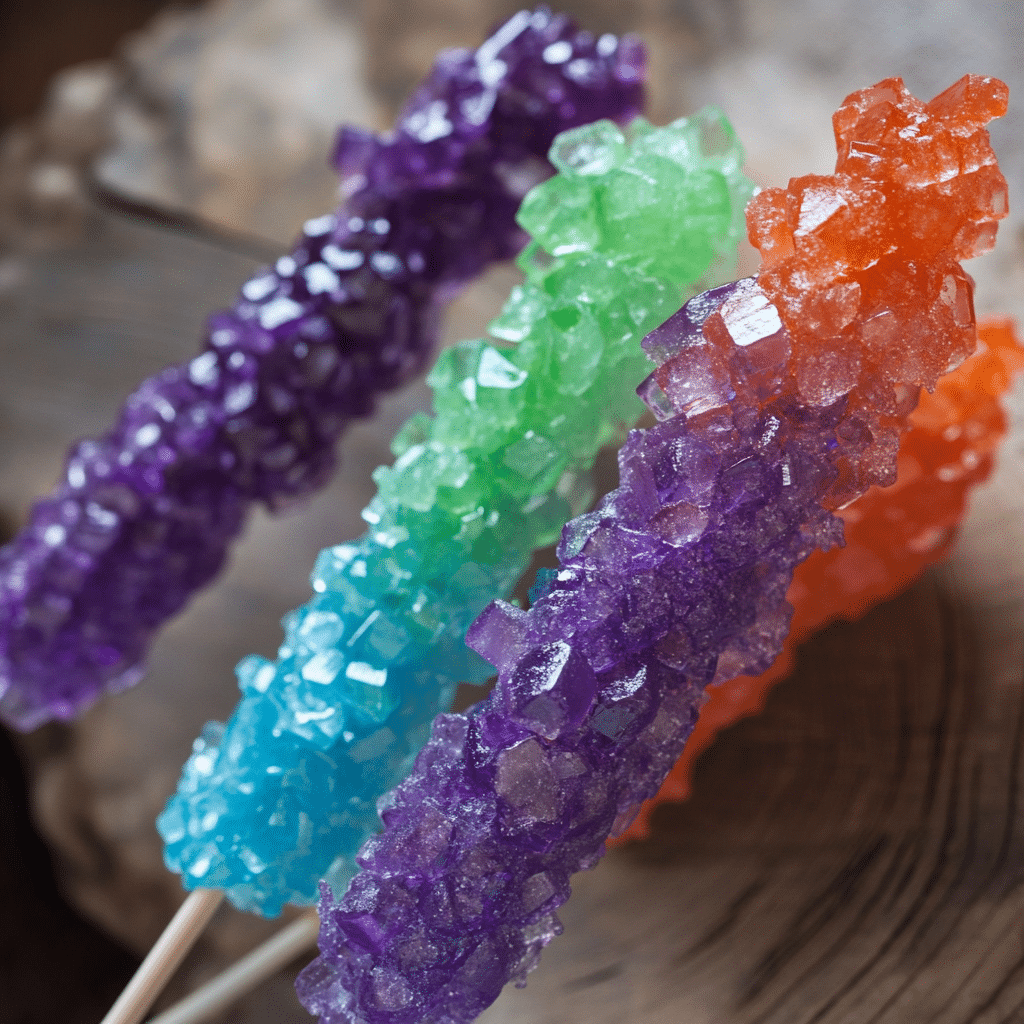
Flavored rock candy not only looks impressive it tastes amazing too. Add flavor extract after removing the sugar solution from heat, once it’s cooled slightly. Popular options include:
- Peppermint or spearmint for holidays
- Strawberry or cherry for classic red rock candy
- Cotton candy or bubblegum for fun party treats
- Coconut or pineapple for tropical vibes
Don’t overdo it: ½ tsp of extract per 1 cup of sugar solution is typically enough.
And if you’re feeling bold? Use edible glitter or sparkling sugar crystals on finished candy to really make it shine. That’s what gives your treat that “magic candy” vibe.
6. Troubleshooting Rock Candy Recipe Problems
Why Your Crystals Aren’t Forming and How to Fix It
It’s frustrating to follow every step and end up with… no crystals. Here are common reasons and how to solve them:
- Solution isn’t saturated enough
- You must dissolve a high amount of sugar at least 3 cups per 1 cup of water.
- If you don’t reach a supersaturated solution, crystals won’t grow.
- Crystals not forming on the stick
- Always “seed” the stick by dipping it in sugar and letting it dry. This gives crystals something to grip.
- Temperature fluctuations
- Keep your jars in a still, cool place. No shaking, no movement.
- Avoid direct sunlight or breezy windows.
- Impurities in sugar or water
- Use filtered water and clean, dry equipment. Residue can interfere with crystallization.
- Patience is key
- Sometimes it takes 2–3 days to see initial growth. Don’t disturb the jars!
What to Do If the Sugar Doesn’t Stick to the Stick
Here are the top reasons sugar won’t cling, and how to fix each one:
| Problem | Solution |
|---|---|
| Stick is too smooth | Rough up the stick with sandpaper before dipping |
| No seed crystals | Always coat sticks in sugar first, then dry |
| Stick touches jar sides or bottom | Suspend it properly with a clothespin |
| Humid environment | Run a fan or dehumidifier nearby to reduce moisture in the air |
If you’ve followed all these tips and still no luck, try reboiling your solution and adding more sugar. Just don’t skip the drying step after seeding the stick it’s critical.
7. Rock Candy Recipe Variations & Creative Twists
Rainbow Rock Candy, Cotton Candy Flavor, and More
The best thing about making rock candy at home? You’re not stuck with just plain sugar crystals. Here are some exciting variations that go beyond the basics:
- Rainbow Rock Candy
- Prepare 5–6 jars of sugar solution, each dyed a different color.
- Rotate your stick between jars every 24 hours for layered color effects.
- This variation is especially great for birthday parties or pride-themed events.
- Cotton Candy Flavored Crystals
- Add cotton candy flavor extract and pastel food coloring.
- Finish with edible glitter for that dreamy carnival vibe.
- Candy Cane Rock Candy
- Use peppermint extract and red/white color swirling.
- Break it into shards and sprinkle over desserts during holidays.
- Sour Rock Candy
- Add citric acid powder to your solution after it cools.
- Creates a tangy-sweet twist that kids (and adventurous adults) love.
Magic Candy Versions: Edible Glitter, Glow Rock Candy, and Layered Colors
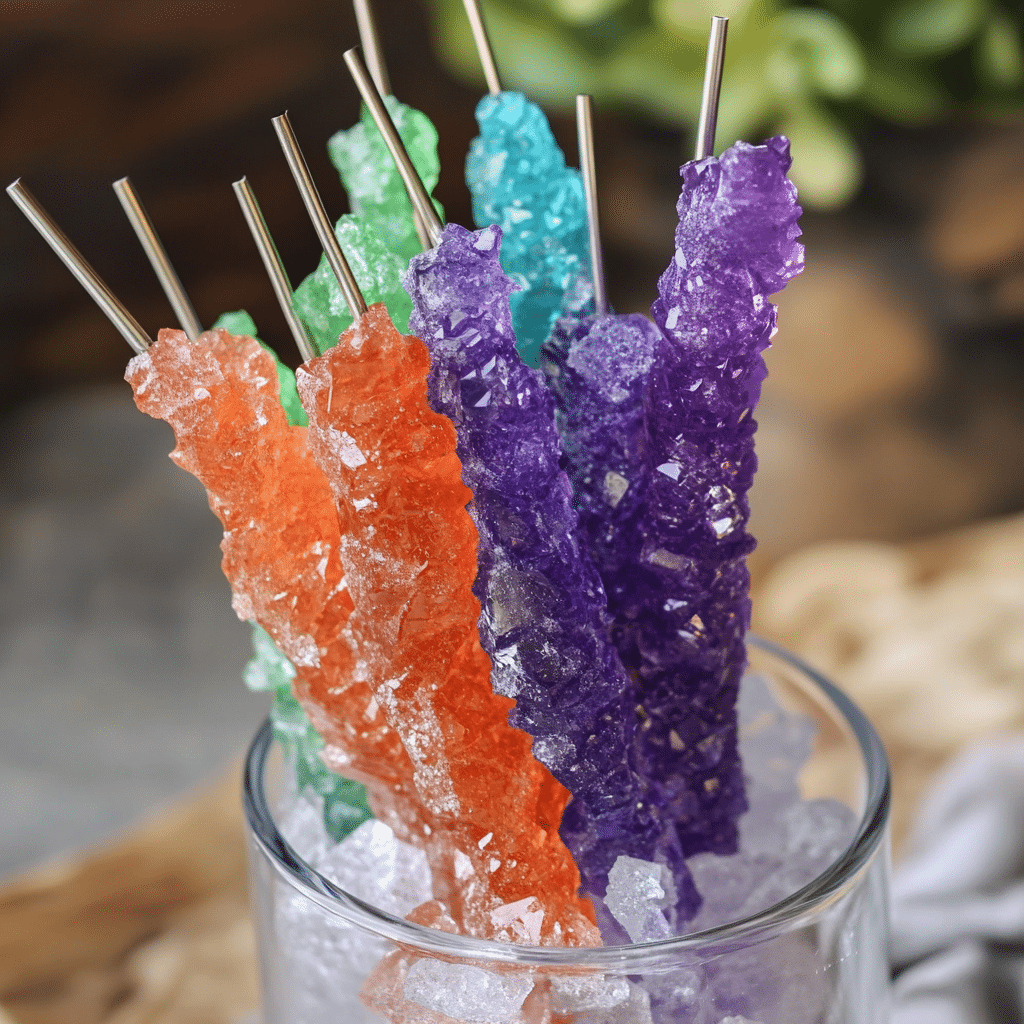
Take your recipe rock candy from simple to magical with these epic upgrades:
- Glow Rock Candy
- Use tonic water in place of regular water. Quinine reacts under blacklight and creates a cool glowing effect.
- Works great for Halloween or glow-in-the-dark parties.
- Layered Rock Candy
- Let crystals grow for 2–3 days in one jar, then switch to a different color solution.
- Repeat to build up eye-catching color bands.
- Edible Glitter Finish
- After drying, brush on edible glitter using a food-safe paintbrush.
- Adds sparkle and magic to themed candy bars or unicorn treats.
- Spicy Rock Candy
- Add a tiny dash of cayenne or cinnamon oil for a fiery surprise.
These variations are a great way to turn a simple science experiment into a personalized and memorable candy project.
8. Storing, Wrapping, and Gifting Homemade Rock Candy
Best Way to Store Rock Candy for Freshness
Rock candy might look tough and sparkly, but it’s still sugar and sugar can absorb moisture and lose its crunch if not stored correctly. Here’s how to keep it fresh:
- Use airtight containers: Mason jars, resealable bags, or candy tins work best.
- Keep in a cool, dry place: Avoid humid kitchens or spots near the stove.
- Avoid refrigeration: Cold temps can cause condensation and ruin your crystals.
- Use parchment paper to separate sticks: Prevents them from sticking together.
Properly stored, your rock candy can last up to 6 weeks with no issues.
DIY Packaging Ideas for Party Favors or Gifts
Rock candy makes a perfect handmade gift and with just a few simple packaging ideas, it can look as good as it tastes:
| Packaging Option | What to Use |
|---|---|
| Individual Treat Bags | Clear cellophane bags + twist ties or ribbons |
| Glass Jars | Small mason jars with a custom tag and string |
| Candy Bouquets | Arrange sticks in a foam base like flowers |
| Themed Labels | Add fun labels like “Wizard Crystals” or “Unicorn Candy” for kids’ parties |
Make it magical by attaching custom tags, colorful bows, or even using holographic wrap for extra shine. For weddings or holidays, coordinate the candy color with the theme for a truly personal touch.
9. Candy Science: The Chemistry Behind Rock Candy Crystals
How Supersaturation Creates Sugar Crystals
At the heart of rock candy is a fascinating chemistry concept: supersaturation. Here’s how it works:
- When you heat water, its molecules move apart, allowing it to dissolve more sugar than it normally would.
- Once it cools, the water can’t hold that much sugar anymore so the sugar starts to “fall out” of the solution and bind to available surfaces.
- If you provide a “seed” like a sugar-coated stick or string, the sugar grabs onto it and begins to stack into crystals.
This isn’t just kitchen magic—it’s physics in action. Over a few days, those stacks become the beautiful, jagged crystals we know as rock candy.
Fun Science Experiments With Kids Using Rock Candy
Rock candy is a hands-on way to teach children about:
- Solutions and saturation
- Evaporation and crystallization
- Time-lapse growth processes
To make it extra educational:
- Have them record daily growth changes in a journal.
- Let them experiment with different temperatures or sugar ratios to observe the impact.
- Try coloring each jar a different hue and let them predict which grows fastest.
It’s a sweet way to turn STEM into a snack.
FAQs About Recipe Rock Candy
1. How to make rock candy?
To make rock candy, boil sugar and water until fully dissolved, creating a supersaturated solution. Pour into jars, insert sugar-coated sticks or strings, and let crystals form over 5–7 days in a still, cool place. Customize with food coloring or flavors for extra fun.
2. How is candy rock made?
Candy rock is made by growing sugar crystals from a hot, saturated sugar solution. As the liquid cools and evaporates, sugar molecules stick together and build crystal structures on a suspended stick or string.
3. What is the main ingredient in rock candy?
The main ingredient in rock candy is granulated white sugar. Water is used to dissolve the sugar, but the candy itself is formed entirely from sugar crystals.
4. Is there a recipe for magic rock candy?
Yes! Magic rock candy involves adding bright food dyes, flavor extracts like cotton candy or sour apple, and fun touches like edible glitter or glow-in-the-dark tonic water. Layering and creative coloring bring the “magic” to life.
5. How to get Magic Candy ingredients?
You can find magic candy ingredients like edible glitter, food-safe colorants, and extract flavors at baking supply stores, craft stores, or online. Some grocery stores also carry fun flavors and dyes in their baking aisle.
Conclusion
Whether you’re diving into this for a science experiment, a fun family kitchen project, or to whip up custom party favors, mastering the recipe rock candy is a simple, satisfying win. From basic sugar crystals to glowing, glitter-dusted candy sticks, the possibilities are endless and all it takes is a bit of patience and creativity.
You’ve learned how to make classic and magic rock candy, fix common mistakes, explore flavors and colors, and even turn your creations into memorable gifts. Now it’s your turn to blend sugar, science, and sparkle into something truly magical.
For more recipes follow me on PINTEREST
PrintEasy & Magical Recipe Rock Candy: The Ultimate DIY Sweet Crystal Guide
A fun, flavorful, and visually magical homemade treat, this rock candy recipe is perfect for parties, gifts, or hands-on science experiments. With just sugar, water, and a few creative twists, you can grow sparkling crystals right in your kitchen.
- Prep Time: 15 minutes
- Cook Time: 45–60 minutes
- Total Time: 5–7 days
- Yield: 8 servings 1x
- Category: Candy
- Cuisine: American
Ingredients
-
3 cups granulated white sugar
-
1 cup water
-
Food coloring (optional)
-
½ teaspoon flavor extract (optional, like cherry, mint, or cotton candy)
-
Wooden skewers or string (for crystal base)
-
Clothespins (to suspend skewers)
-
Clear glass jars
Instructions
-
Boil sugar and water in a saucepan over medium heat, stirring until completely dissolved.
-
Remove from heat, add food coloring and flavor if desired.
-
Pour solution into glass jars and let cool slightly.
-
Dip skewers into the solution, roll in sugar, and let dry for 30 minutes to seed crystals.
-
Suspend skewers in the jars using clothespins.
-
Cover jars loosely and let sit undisturbed in a cool, dry place.
-
After 5–7 days, remove sticks and let them dry on parchment. Enjoy!
Nutrition
- Serving Size: 8 servings
- Calories: 85 kcal
- Sugar: 21g
- Fat: 0g
- Carbohydrates: 22g
- Fiber: 0g

