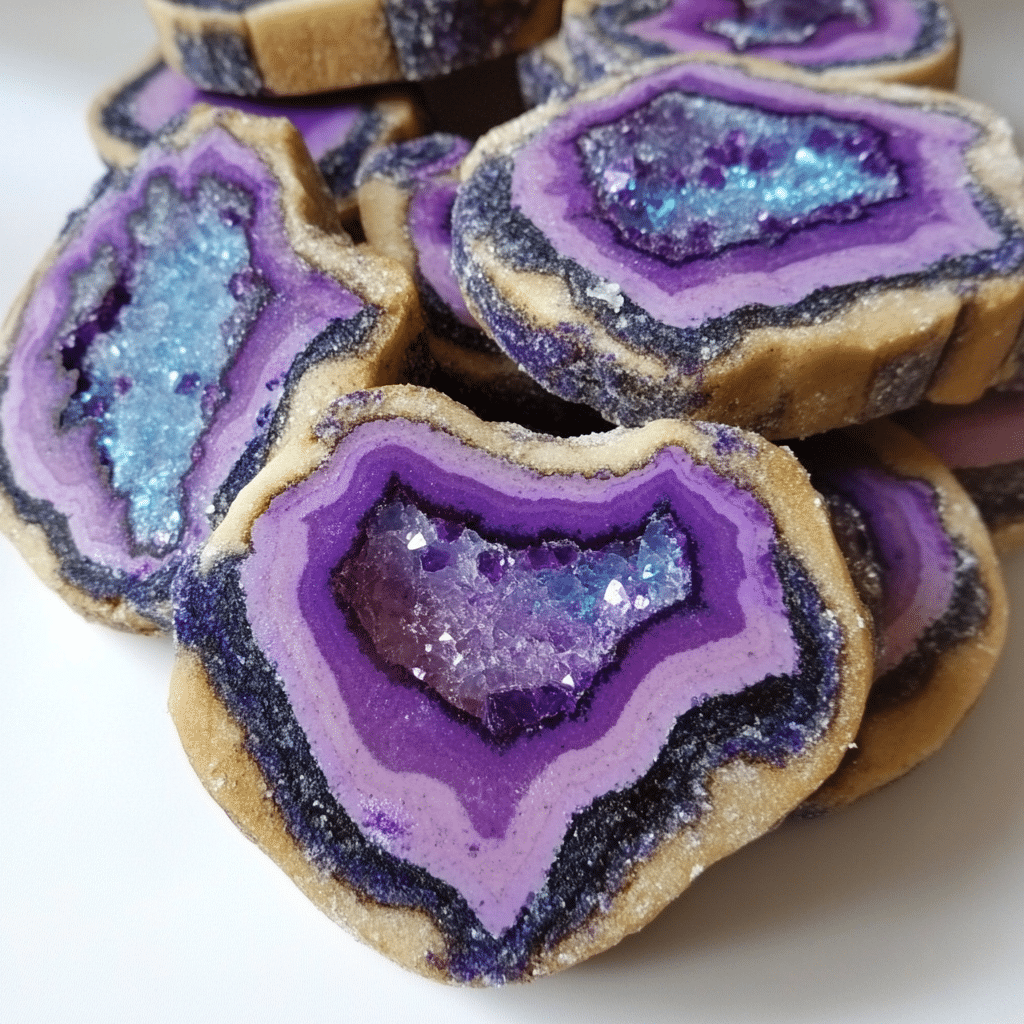
If you’ve ever seen a dessert that looks too beautiful to eat, it was probably a geode cookie. These stunning crystal-studded sweets have taken center stage on social media, party tables, and even wedding dessert bars. Combining edible art with baking, geode cookies are the ultimate creative treat for anyone who loves sparkle and sugar. In this article, we’ll explore everything from how they’re made to their rise in popularity, flavor combinations, and event use.
Table of Contents
Table of Contents
1. What Are Geode Cookies?
Understanding Geode Cookies and Their Popularity
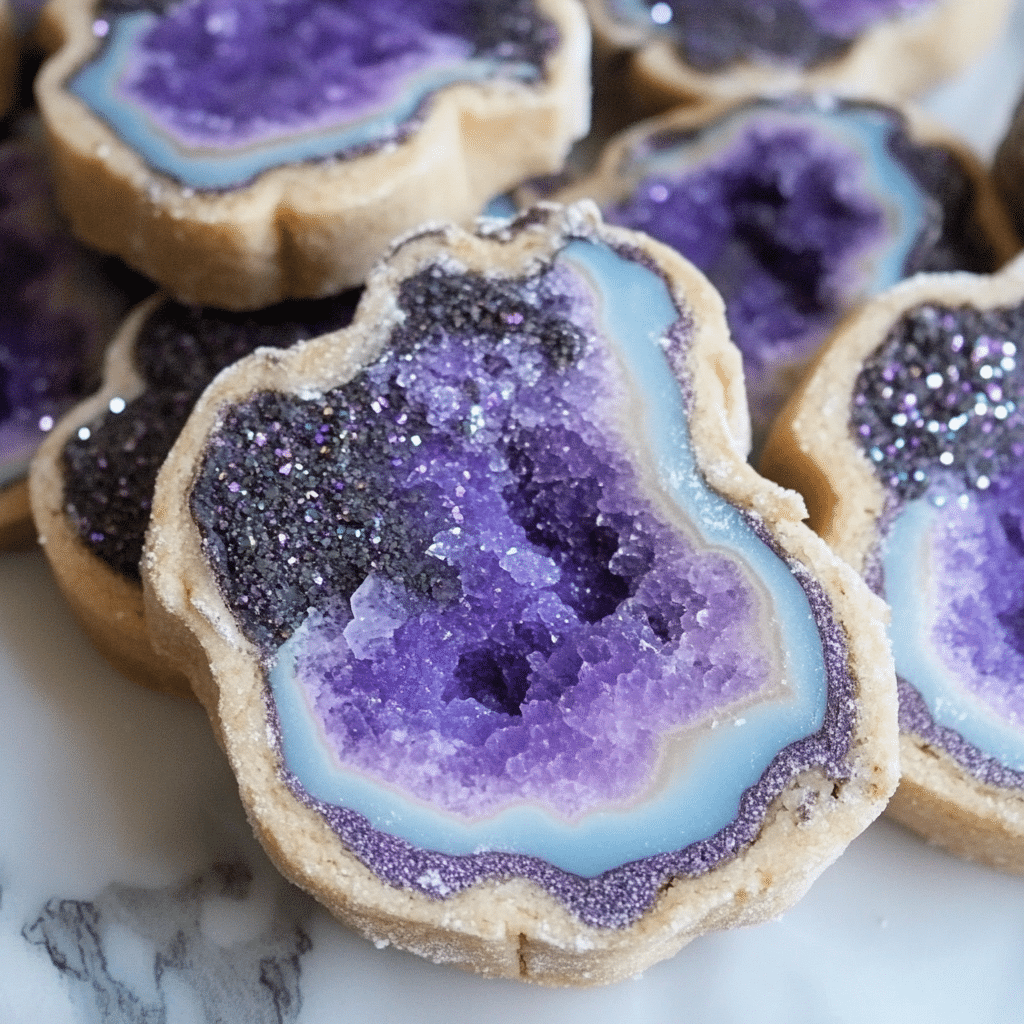
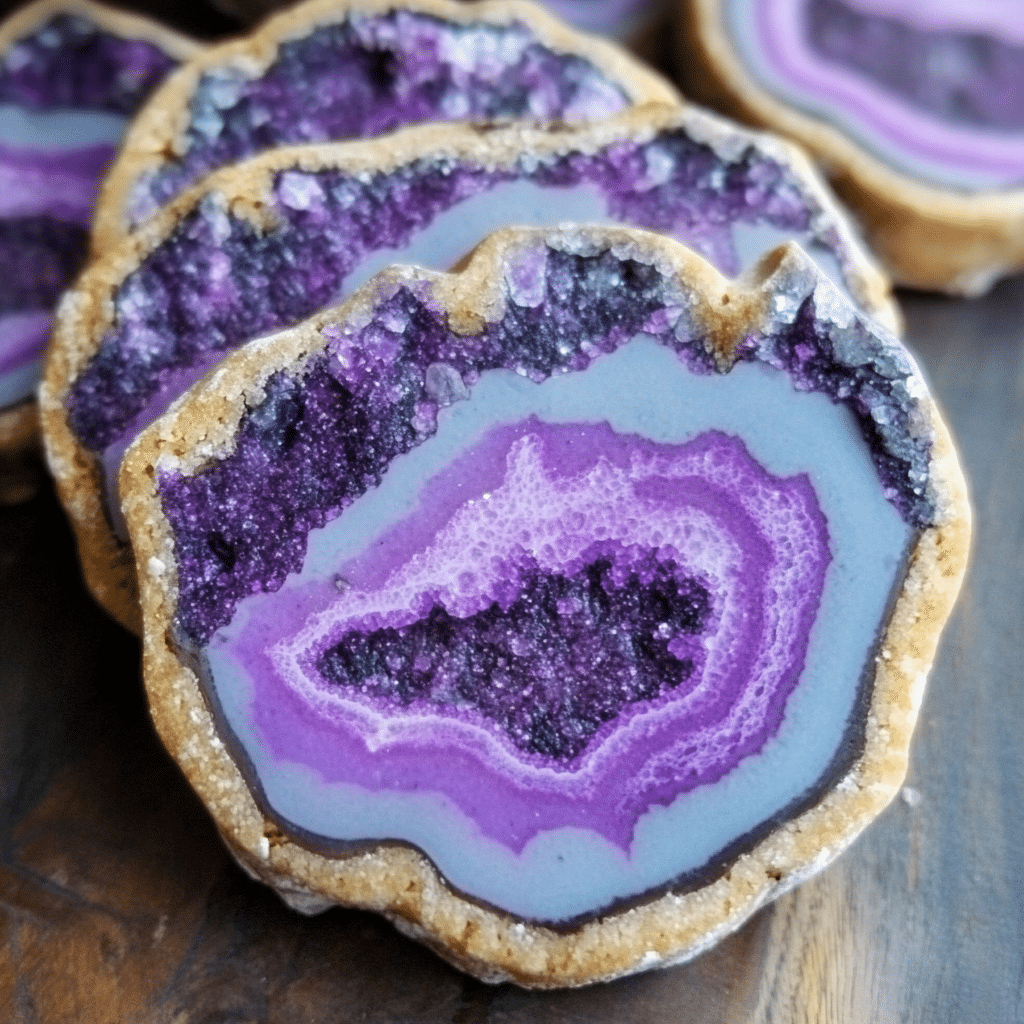
Geode cookies are sugar or shortbread cookies decorated to resemble natural geodes—those rock formations with sparkling crystal interiors. The cookies are usually cut into gemstone shapes and filled with colorful, edible sugar crystals, often using rock candy or isomalt.
The final look mimics real crystal formations, with layers of shimmering edible glitter, metallic luster dust, and realistic shading. What makes them irresistible is how they blend science, nature, and dessert art. These cookies don’t just taste good—they tell a visual story, making them perfect for upscale events, gift boxes, and bakery displays.
Geode cookies gained fame on Instagram and Pinterest for their vibrant, luxurious look. They tapped into a growing market of consumers who want food that looks as impressive as it tastes. With influencers and bakers sharing time-lapse videos of their creation, the trend spread fast.
How Geode Cookies Mimic Real Crystals
Bakers use rock candy, sanding sugar, or edible isomalt to create the sparkling effect. The process begins with baking standard sugar cookies, cutting them into geometric shapes like ovals or freeform geode outlines. A cavity is created in the center using a cookie cutter or carving tool.
This space is then filled with sugar crystals in layered colors to replicate the striations found in natural geodes. The edges are often brushed with edible metallics—like gold or silver luster dust—to complete the illusion. These cookies can look hyper-realistic or be stylized with pastel colors, galaxy themes, or even match wedding palettes.
Learn more about sugar techniques from our Sweet Junk Food Guide, where we explore creative uses of candy.
2. The Origin and Rise of Geode-Themed Sweets
History of Geode Cakes and Transition to Cookies
The first major geode dessert to go viral was the geode cake. In 2016, baker Rachael Teufel made headlines when she crafted a tiered cake embedded with edible crystals for a bridal show. It exploded across social media and quickly became a requested centerpiece for weddings.
As the cake trend matured, bakers began looking for more approachable ways to bring the geode look into smaller events. Enter: geode cookies. Easier to make in batches and customize, cookies made the design more accessible for hobby bakers and cottage businesses.
By late 2017, Pinterest searches for “geode cookies” spiked. Since then, the design has been adapted into cake pops, cupcakes, and even chocolate bars. The versatility of the look helped it cross over into multiple dessert forms.
Why Geode Designs Became an Internet Sensation
Visual impact is key. People are drawn to geode cookies for their brilliance, texture, and handcrafted artistry. Unlike other decorated cookies, they don’t rely solely on piped icing or frosting. Instead, their unique structure and sparkle lend themselves well to time-lapse videos and behind-the-scenes baking content.
On platforms like TikTok and YouTube, geode cookie tutorials garnered millions of views because they offer satisfaction at every step—from crystal placement to metallic edging. And because each cookie is one-of-a-kind, audiences feel like they’re watching edible art unfold.
These cookies also represent a broader trend in dessert design: merging natural elements (like geodes, marble, or agate patterns) with food. They’re a fusion of geology and sugar craft, which sparks curiosity and delight.
3. How to Make Geode Cookies at Home
Ingredients and Tools You’ll Need
Creating geode cookies may seem complicated, but with the right ingredients and tools, even beginner bakers can pull it off. Here’s what you’ll need to start:
Cookie Base
- Sugar cookie dough (homemade or store-bought)
- Rolling pin
- Cookie cutters (geode shapes or circles)
Decoration Materials
- Royal icing or edible glue
- Rock candy or sanding sugar (multiple colors)
- Food coloring gels
- Edible glitter or luster dust (gold, silver, copper)
- Small paintbrush for dusting
- Piping bags and tips
Optional Tools
- Sculpting tool or paring knife to carve cookie centers
- Tweezers for precision candy placement
- Edible markers for outlines
This project is as much about the prep as it is about baking. Be sure to gather all materials before starting to avoid any mid-process hiccups.
Step-by-Step Instructions for Stunning Geode Cookies
- Roll and Bake the Base
Roll out sugar cookie dough to ¼-inch thickness. Cut into ovals, irregular gemstone shapes, or circles. Bake at 350°F for 10-12 minutes. Let them cool completely. - Carve the Cookie Centers
Once cooled, carve a shallow cavity in the center of each cookie to hold the sugar crystals. This mimics the “crack” in a geode. - Apply Royal Icing or Glue
Pipe or spread royal icing in the cavity. This will act as the glue to hold the crystals. If you’re using isomalt, melt and pour it carefully into the center instead. - Layer the Crystals
Start with the darkest sugar crystals in the center, then fade out to lighter colors as you move outward. This gradient effect mimics natural geode layers. - Brush the Edges
Use a small brush to apply edible luster dust around the crystal edges. Gold is a classic, but rose gold and silver give elegant finishes too. - Dry and Set
Let cookies sit for at least 2 hours until the icing or isomalt is fully set. For best results, store them flat while drying.
4. Best Techniques to Craft Realistic Crystal Effects
Using Rock Candy and Edible Glitter
Rock candy is a favorite medium for geode cookies because of its jagged, gem-like texture. Available in bulk and in a variety of colors, rock candy helps mimic quartz, amethyst, and agate stones.
To use it effectively:
- Crush larger chunks for texture variation.
- Choose contrasting hues for layered geodes (e.g., deep purple inside, fading to lavender).
- Use edible glitter or luster spray lightly on top to boost sparkle under lights.
If you want smaller crystals, try using sanding sugar. It offers a subtler sparkle and works well for outlining the geode edge or layering around larger chunks.
For a shimmering effect, edible glitter can be dusted across the cookie surface after the icing has dried. Use only a pinch—it’s powerful stuff.
Coloring and Shaping Tips for Realistic Geodes
Real geodes don’t have uniform shapes or colors, and your cookies shouldn’t either. A few pro tips:
- Use freeform cookie cutters or hand-carve jagged edges.
- Mix color tones using gel food colors and a touch of alcohol or extract to “paint” subtle shading inside the sugar crystals.
- Add a faint shadow with edible markers or dust to create depth.
Some bakers even bake two-tone cookie doughs (chocolate and vanilla) for a realistic rock-like exterior. You can also add a marbled effect to the base icing to imitate polished stone.
5. Flavor Ideas and Combinations for Geode Cookies
Popular Flavors That Pair with Geode Designs
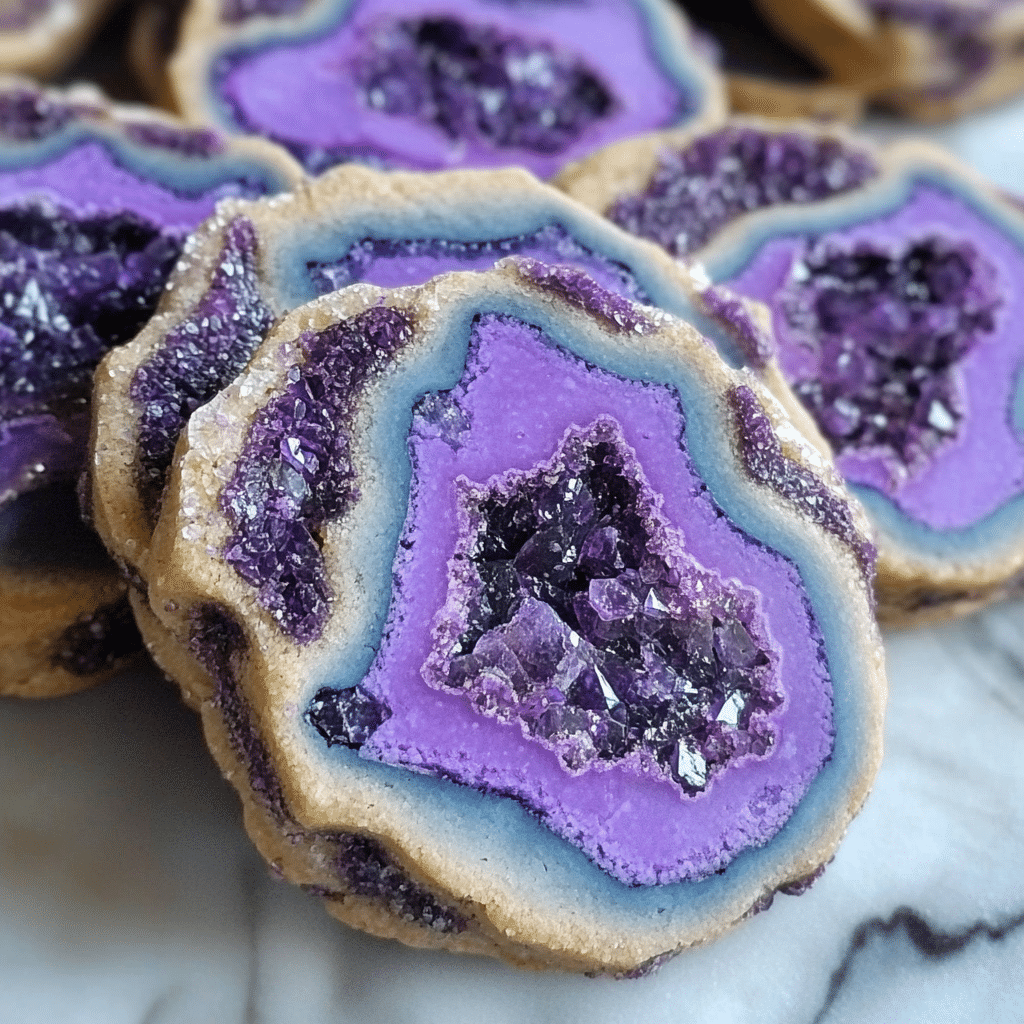
Geode cookies may dazzle with their appearance, but flavor matters just as much. The most popular base flavors tend to complement the sweet crunch of the crystals without overpowering them. Here are a few go-to choices:
- Vanilla Sugar Cookie – A classic base that enhances the sweetness of the rock candy.
- Lemon Zest Cookie – The slight tartness adds contrast and cuts through the sugar.
- Almond Shortbread – Rich and buttery, perfect for formal events like weddings.
- Chocolate Sugar Cookie – Offers a dramatic background for colorful crystals and tastes rich and indulgent.
These flavors work well because they don’t clash with the sugary toppings, and they create a clean canvas for design work.
For deeper richness, some bakers add subtle flavor extracts to the icing—like orange blossom, peppermint, or lavender.
Unique Flavor Twists for Gourmet Creations
If you want to elevate your geode cookies beyond the basics, try flavor combos that surprise and delight:
- Earl Grey & Vanilla – Tea-infused cookies with vanilla icing and purple rock candy.
- Rose & Pistachio – A floral twist paired with nutty richness and pink crystals.
- Matcha & White Chocolate – Earthy green matcha paired with sweet crystals and metallic gold dust.
- Coconut & Lime – Tropical base with bright colors like aquamarine and mint green.
These pairings allow you to experiment with flavor while keeping the visual appeal intact. Just be sure your icing and crystal elements support the flavors, not overpower them.
6. Geode Cookies for Events and Celebrations
Wedding, Baby Shower, and Birthday Themes
Geode cookies are a hit at events because they double as edible decor. Their gemstone-like sparkle adds elegance to any dessert table. Here’s how they shine at specific events:
- Weddings: Custom-colored geode cookies that match the couple’s color palette are used as table settings or edible favors. Common colors: rose gold, lavender, jade green.
- Baby Showers: Pastel geodes (like pale pink, mint, or soft blue) celebrate new arrivals in style.
- Birthdays: Bright, bold geode cookies bring energy and glam to themed parties—think galaxy parties with black and purple geodes or unicorn themes with rainbow crystals.
Cookies can be monogrammed, individually packaged, or attached to event cards for a personalized touch.
How to Personalize Geode Cookies for Any Occasion
One of the best parts of making geode cookies is how easily they can be customized. Consider these ideas:
- Add Edible Names or Numbers: Use edible markers or icing to write initials, names, or age numbers across the cookie surface or edge.
- Color Match to Event Decor: Dye your sugar crystals or rock candy to reflect event branding, seasonal themes, or even sports teams.
- Incorporate Logos or Messages: For corporate events, you can laser-print edible logos or write messages with edible ink pens.
- Use Themed Shapes: Instead of circles or ovals, try hearts for Valentine’s Day or stars for a cosmic theme.
Because they’re easy to transport and individually wrapped, geode cookies are ideal party favors for large or intimate events.
Don’t miss our Sweet Junk Food Guide to explore more themed dessert ideas that dazzle at gatherings.
7. Geode Cookies vs Geode Cakes
Visual and Culinary Differences
While both desserts share the sparkling geode aesthetic, geode cookies and geode cakes differ in execution, flavor structure, and presentation. Here’s a breakdown:
| Feature | Geode Cookies | Geode Cakes |
|---|---|---|
| Size | Small, handheld | Large, tiered centerpiece |
| Serving Style | Individually served | Sliced and plated |
| Texture | Crisp, crunchy | Soft sponge or layered cake |
| Decoration | Rock candy on cookie base | Carved cake with isomalt or candy center |
| Customization | Easier to batch-produce with variety | Requires more skill for large-scale design |
| Event Use | Party favors, small treats | Event centerpiece (weddings, big parties) |
| Shelf Life | Up to 2 weeks | Best within 2–3 days |
Geode cakes are dramatic showpieces meant to impress as a centerpiece. They demand advanced cake carving and sugar sculpting techniques. Meanwhile, geode cookies are more approachable for both home bakers and professionals—ideal for gifting or serving in quantity.
Because of their portability and customizability, cookies are often preferred for events where guests want something individually wrapped and easy to take home.
When to Choose Cookies Over Cake for Your Event
Choosing between geode cookies and cakes depends on your event goals, guest count, and budget.
Choose geode cookies if:
- You want edible party favors
- You’re hosting a smaller gathering
- Budget or time is limited
- You want to offer guests personalized sweets
Choose geode cakes if:
- You’re planning a wedding or gala
- You need a showstopper for a dessert table
- You have the budget and time for professional decorating
Both options bring sparkle and elegance to your table—but cookies offer more flexibility when you’re managing events with multiple dessert types or when you want take-home gifts.
8. Common Mistakes When Making Geode Cookies
Troubleshooting Crystal Application
Making geode cookies is part science, part artistry—and mistakes can happen. One of the most common issues is crystals not sticking properly. This usually happens when:
- The royal icing hasn’t set slightly before adding sugar. Always give the icing 30–60 seconds to get tacky before pressing in crystals.
- You use too much icing. Excess icing can pool, causing sugar to slide or clump.
- Your cookie surface is warm or greasy. Always work on fully cooled cookies for best adhesion.
To fix this:
- Use tweezers for precision placement.
- Let each cookie dry flat in a cool room for at least 2–3 hours before moving or packaging.
Another issue? Cloudy or dull crystals. This can happen with older rock candy or over-brushed luster dust. Use fresh candy and apply shimmer sparingly to avoid dulling the sparkle.
Fixing Texture and Shape Issues
Cookies that spread too much during baking won’t hold the desired geode shape. Prevent this by:
- Chilling dough for 30 minutes before cutting shapes
- Using parchment or silicone mats to prevent uneven browning
- Rolling dough to even thickness
If your carved cavity is too shallow or deep, the effect won’t look realistic. Aim for a depth of about 1/8-inch just enough to hold sugar but still show the layers.
One more common issue is overloading the cookie with crystals. Geodes look best with negative space around the edges. Too much sugar hides the details and makes them difficult to eat.
9. How to Store and Display Geode Cookies
Best Practices for Long-Term Storage
Because geode cookies are heavily decorated with sugar crystals, proper storage is key to maintaining their sparkle and texture. While they look like delicate art, they’re surprisingly durable if stored the right way.
Follow these tips to keep them fresh and fabulous:
- Cool, Dry Environment: Store cookies at room temperature in a low-humidity space. Moisture can dull or dissolve sugar crystals.
- Airtight Containers: Place cookies in a single layer in airtight containers with parchment between layers to prevent sticking or breaking.
- Avoid Refrigeration: The fridge introduces condensation, which can ruin both the texture and color of sugar elements.
- Shelf Life: When stored properly, geode cookies can stay fresh for 10 to 14 days. If vacuum-sealed or tightly packaged, up to 3 weeks.
If you’re shipping them or preparing them for future events, consider adding a food-safe silica pack to help control moisture levels in the packaging.
Creative Presentation and Packaging Tips
Geode cookies are more than just treats—they’re edible gifts. Presentation plays a big role, especially if you’re offering them as favors or selling them.
Here are a few creative ideas:
- Clear Boxes or Cellophane Bags: Showcase the design without hiding it. Add a ribbon or event-themed tag for flair.
- Custom Labels or Stickers: Include flavor info, ingredients, or event branding directly on the packaging.
- Tray Displays: For dessert tables, arrange cookies on mirrored trays or marble slabs to complement the crystal look.
- Shadow Box or Jewelry Display Style: For upscale events, place each cookie in a mini shadow box for a gem-like presentation.
Cookies make a great takeaway item or gift, and with the right packaging, they’ll make just as much of an impact as the event itself.
Don’t miss our Homemade Hard Candy Guide for more storage-friendly sweets and display inspiration.
FAQ
What are the most expensive cookies in the world?
The priciest cookies are often those infused with rare ingredients like edible gold, saffron, or luxury chocolate. One example is the $1,000 cookie from New York’s “Duchess Cookies,” decorated with 23-karat gold and stuffed with truffle cream. These luxury cookies are more about experience and exclusivity than just flavor.
What are Greek crescent shaped cookies?
Greek crescent-shaped cookies are known as Kourabiedes. These buttery shortbread-style cookies are made with almonds, dusted in powdered sugar, and traditionally served during Christmas or weddings. Their rich texture and crescent shape make them both elegant and comforting.
Do you put sugar crystals on cookies before baking?
It depends on the type of sugar and desired look. Coarse sanding sugar or raw sugar can be added before baking to add crunch and sparkle. However, for decorative sugar crystals like those used in geode cookies, it’s best to apply them after baking using royal icing or edible glue. This ensures the crystals stay sharp and vibrant.
How to store geode cake?
Geode cakes should be stored in a cool, dry place, ideally in a cake box at room temperature for 1–2 days. For longer storage, place in the fridge but protect the crystal section with parchment or plastic wrap to prevent moisture damage. Isomalt-based crystals hold up better than sugar ones if the cake needs to last.
Are geode cakes still popular?
Yes, geode cakes continue to be popular especially for weddings, milestone birthdays, and luxury events. Though the initial trend exploded in 2016, it has evolved with new color palettes, metallic finishes, and floral integrations. They remain a top choice for clients who want a blend of elegance, uniqueness, and artistry.
For more recipes follow me on PINTEREST
PrintGeode Cookies – The Sparkling Trend Taking Over Custom Desserts
Geode Cookies are elegant, crystal-inspired treats made from buttery sugar cookie dough, filled with colorful rock candy and edible glitter. These stunning cookies combine artistic presentation with simple baking steps—perfect for weddings, parties, and gift boxes. They’re not only gorgeous but also delicious, offering a sweet crunch and visual sparkle in every bite.
- Prep Time: 30 minutes
- Cook Time: 60 minutes
- Total Time: 2 hours 12 minutes
- Yield: 18 cookies 1x
- Category: Candy
- Cuisine: American
Ingredients
For the Cookies:
-
2½ cups all-purpose flour
-
1 cup unsalted butter (softened)
-
1 cup granulated sugar
-
1 large egg
-
1 tsp vanilla extract
-
½ tsp almond extract (optional)
-
½ tsp baking powder
-
¼ tsp salt
For Decoration:
-
1 batch royal icing or edible sugar glue
-
Rock candy (crushed, assorted colors)
-
Edible glitter or luster dust (gold, silver, rose gold)
-
Food coloring gel (optional)
-
Edible marker (for outlines)
-
Small paintbrush (for glitter application)
Instructions
-
Prepare the Dough:
Cream butter and sugar together until fluffy. Add the egg and extracts. Slowly mix in dry ingredients until fully combined. Chill dough for 30 minutes. -
Roll and Cut:
Roll dough to ¼-inch thickness. Cut into geode shapes using oval or irregular cookie cutters. Transfer to a parchment-lined baking sheet. -
Bake:
Bake at 350°F (175°C) for 10–12 minutes or until edges are lightly golden. Let cool completely. -
Carve the Centers:
Use a sharp tool or small cutter to gently carve a shallow cavity in each cookie for the crystal center. -
Add Icing:
Fill each cavity with royal icing or edible glue to create a sticky base for sugar crystals. -
Decorate with Crystals:
Layer crushed rock candy starting from the center (darker color) and fading outward to lighter colors. Press lightly into the icing. -
Finish with Glitter:
Use a fine brush to apply edible luster dust to the edges. Add edible glitter for shimmer. -
Dry & Serve:
Let cookies dry for 2–3 hours until set. Serve or package individually for gifts or events.
Nutrition
- Serving Size: 18 cookies
- Calories: 180 kcal
- Sugar: 16g
- Sodium: 65mg
- Fat: 7g
- Saturated Fat: 4g
- Carbohydrates: 28g
- Fiber: 0.3g
- Protein: 2g
- Cholesterol: 20mg

