Homemade rock candy isn’t just a nostalgic treat—it’s a fun, edible science experiment that dazzles both kids and adults. In this guide, you’ll discover how to make rock candy easily with ingredients you likely already have in your kitchen. From understanding the sugar saturation process to selecting the best flavors and colors, we’ll cover every angle. You’ll also learn how sugar transforms into vibrant crystal sticks, the health side of rock candy, and tips for customizing your own batches.
Looking for inspiration? Try this sweet twist on fizzing candy: Fizzing Candy: The Sweetest Science Behind the Pop and Crackle
1. What Is Homemade Rock Candy?
Understanding the Basics of Rock Candy
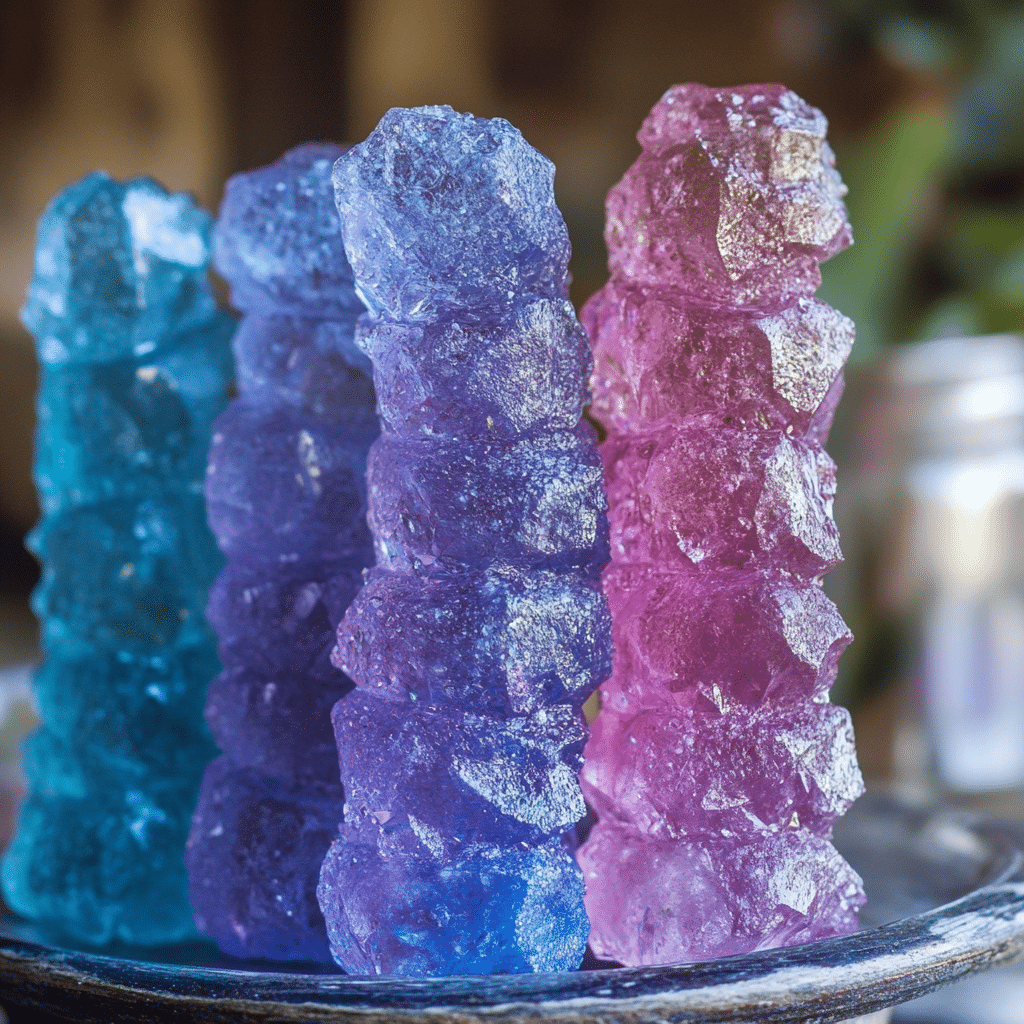
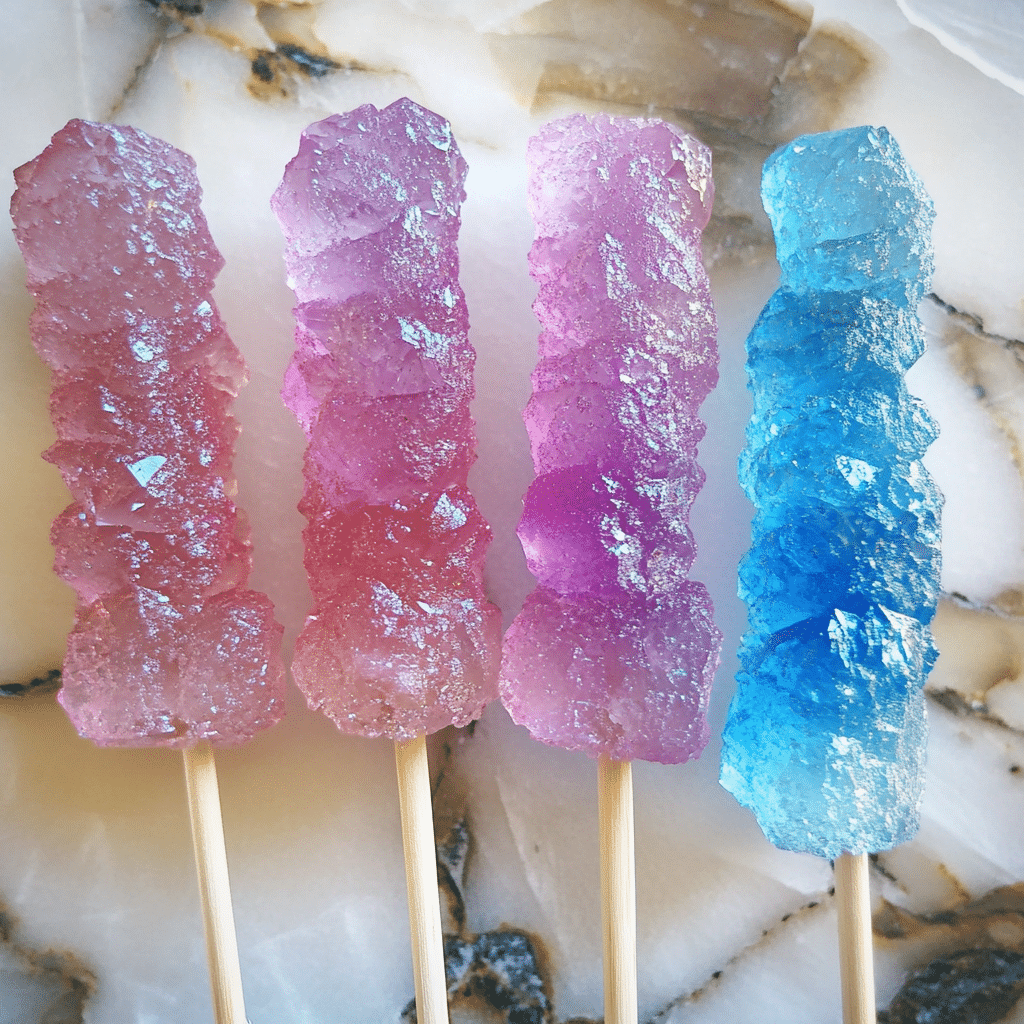
Homemade rock candy is pure crystallized sugar formed by allowing a super-saturated sugar solution to slowly evaporate and grow into large crystals on a stick or string. It’s not just a treat—it’s a visual demonstration of science in action. Rock candy has been used for centuries in everything from Chinese medicine to cocktail garnishes. Whether you’re making it for fun, decoration, or flavor, it’s a simple yet fascinating process.
Why Make Rock Candy at Home?
Making rock candy at home is not only budget-friendly but also offers full control over flavors, colors, and even shapes. You get to customize each batch with food coloring, natural extracts, or even edible glitter. It’s also a great hands-on activity for kids, helping them understand evaporation, saturation, and crystallization. Plus, let’s be real—it tastes amazing.
The History of Rock Candy
Rock candy traces its origins back to ancient India and Persia. Known as “mishri” in Hindi and “nabat” in Persian, it was traditionally used to treat sore throats and balance digestion. Today, it’s enjoyed globally as a sweet snack, cocktail stirrer, or decorative dessert topping.
2. How to Make Rock Candy Easily at Home
Simple Rock Candy Recipe (Step-by-Step)
Making rock candy is easier than you think. Here’s a foolproof method:
Ingredients:
| Ingredient | Quantity |
|---|---|
| Granulated sugar | 2 cups |
| Water | 1 cup |
| Food coloring | (optional) |
| Flavor extract | 1/2 tsp |
| Wooden skewers or strings | As needed |
| Glass jars | Clean, dry |
Steps:
- Boil the water in a saucepan.
- Gradually add sugar while stirring until fully dissolved (solution should become thick and glossy).
- Add food coloring and flavoring, then let the solution cool slightly.
- Dip a skewer in the solution, roll it in dry sugar, and let it dry for 1 hour (this jumpstarts crystal formation).
- Pour sugar solution into jars and suspend skewers without touching the bottom.
- Cover loosely with paper towel and let it sit undisturbed for 5–7 days.
Don’t miss our chocolate coating tips: Chocolate & Coated Treats
Common Mistakes to Avoid
- Using too little sugar: your solution needs to be fully saturated.
- Moving the jars: any disturbance stops crystal growth.
- Skewers touching the jar’s bottom or sides.
- Humid environments can slow evaporation and crystallization.
Customizing Your Rock Candy
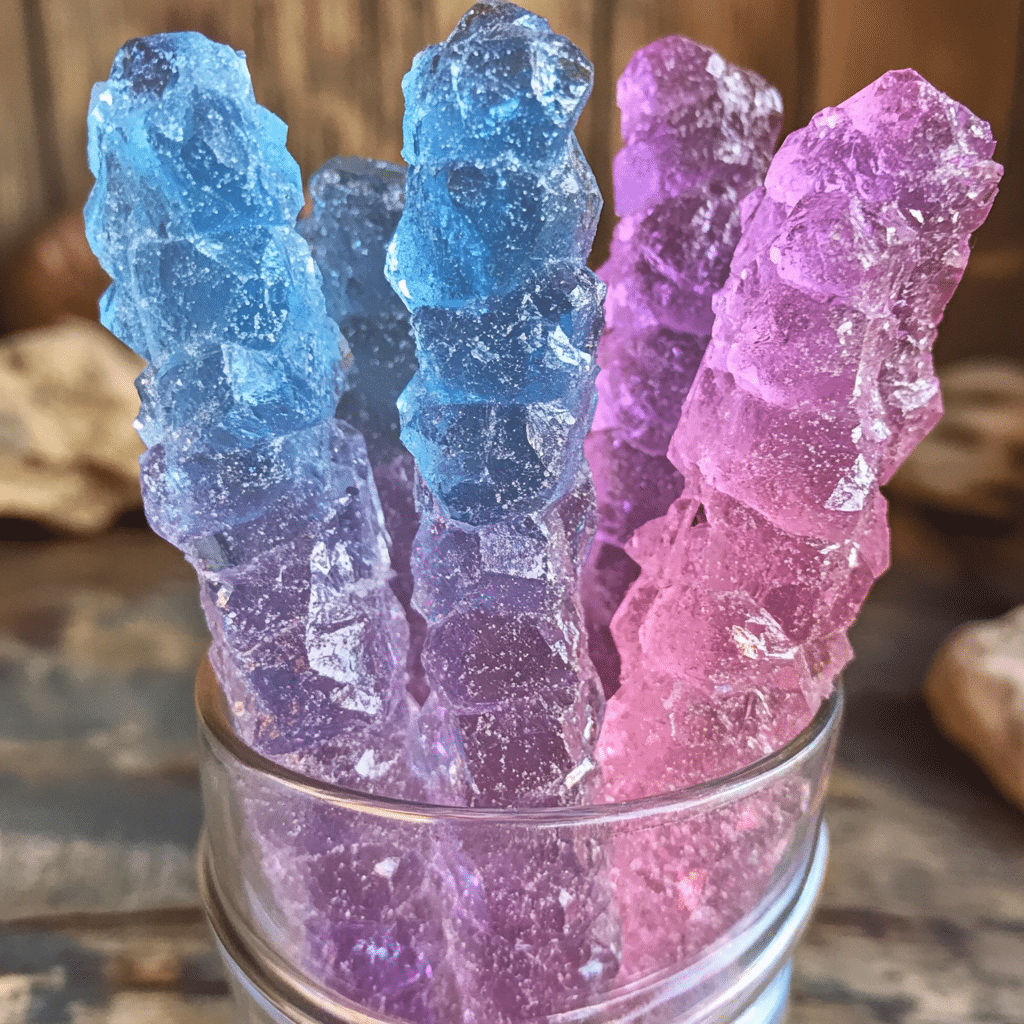
Want rainbow crystals? Use multiple jars with different food coloring. You can also infuse extracts like peppermint, cherry, or vanilla for flavor depth. Add glitter or edible shimmer for a magical aesthetic.
3. What Ingredients Are in Candy Rocks?
The Science Behind the Ingredients

The primary ingredient in rock candy is sugar—specifically, sucrose. It’s the compound responsible for crystal formation. Water acts as the dissolving agent, allowing the sugar to saturate and later crystallize. Flavorings and colorings add personality, but sugar is the star.
Ingredient Breakdown Table:
| Ingredient | Purpose |
|---|---|
| Granulated sugar | Crystal structure and sweetness |
| Water | Solvent for sugar |
| Food coloring | Aesthetic appeal |
| Flavor extract | Adds taste (optional but fun) |
| Wooden skewer | Surface for crystal growth |
Natural vs. Artificial Ingredients
Want to go natural? Use beet sugar or cane sugar instead of refined white sugar. You can replace synthetic colors with natural ones made from fruits or veggies, and opt for organic extracts like peppermint oil or lemon zest.
Discover great ideas like chewy textures in candy: Gummies & Chews
4. Is Rock Candy Healthy?
Rock Candy and Sugar Content
Let’s be clear: rock candy is pure sugar. A single stick can contain more than 70 grams of sugar, which is well over the recommended daily intake for adults. While it’s okay as an occasional treat, it’s not suitable for regular consumption—especially for those managing blood sugar or trying to lose weight.
| Nutritional Info (Approx.) | Per Stick |
|---|---|
| Calories | 250–300 |
| Sugar | 70–80g |
| Fat | 0g |
| Fiber | 0g |
Can Rock Candy Be Made Healthier?
Yes! Use smaller portions, reduce the crystal size, or create mini candy sticks for smaller sugar servings. You can also add natural flavors like mint or lemon, which may offer some digestive benefits.
Rock Candy vs. Other Candies
Compared to processed commercial candies, rock candy contains fewer additives—no preservatives, emulsifiers, or complex sugars. However, the high glycemic index still makes it a high-sugar snack. It’s better than some candies but still not a “healthy” option.
Check out how to make no-bake citrus treats with fewer calories: Orange Creamsicle Truffles
5. What Type of Solution Is Needed to Make Rock Candy?
Understanding Supersaturation
To create rock candy, you need a supersaturated sugar solution. This happens when more sugar is dissolved in water than it would normally hold at room temperature. Heating the water increases its capacity to hold sugar. Once it cools, the excess sugar begins to crystallize, clinging to the skewer or string suspended in the solution.
How to Create a Supersaturated Solution
- Start with a 2:1 ratio of sugar to water.
- Boil the water, then slowly stir in sugar until it no longer dissolves.
- This saturation point signals that the solution is ready.
- Let it cool slightly before pouring it into jars.
The key is patience—any shortcut in this step will lead to weak or slow crystal formation.
Why Supersaturation Is Critical
Without proper supersaturation, the sugar won’t precipitate into large crystals. Instead, it might dissolve completely or form tiny, dusty grains. Crystallization needs that precise imbalance between solubility and evaporation.
6. How Does a Sugar Solution Become Rock Candy?
The Crystallization Process

Once the supersaturated sugar solution begins to cool and evaporate, sugar molecules start to gather and organize into solid crystals. These clusters form faster around a “seed” surface, like the sugar-dusted skewer you placed in the jar.
Here’s how it happens:
- Water starts evaporating.
- The solution becomes unstable.
- Sugar molecules begin forming solid bonds.
- Crystals grow layer by layer over days.
Timeframe and Growth
Crystal growth is visible within 24 hours but takes 5–7 days for large, structured crystals. The slower the evaporation, the more defined and larger the crystals.
| Time | Crystal Size | Observation |
|---|---|---|
| Day 1 | Small grains | Thin, scattered |
| Day 3 | Medium | Thicker formation |
| Day 5–7 | Large, dense | Full crystal coverage |
Environmental Factors Affecting Growth
- Humidity slows down evaporation.
- Cool rooms promote better formation.
- Vibrations or movement disturb the delicate crystal lattice.
7. Creative Ways to Use Homemade Rock Candy
Party Favors and Themed Events
Homemade rock candy makes perfect party favors. Customize the colors to match your theme—pastels for baby showers, jewel tones for weddings, neon for birthday parties. Wrap them in cellophane with ribbons and name tags for a professional touch.
Edible Decorations for Cakes and Drinks
Add visual flair by using rock candy sticks in cakes as crystal toppers or stirrers in cocktails. They shimmer like gemstones and dissolve slowly, adding both taste and style.
Don’t miss our candy art recipes: Cotton Candy Cookies – The Sweetest Guide
DIY Gift Jars
Layer multiple colors in a clear jar with a note explaining how they were made. It’s a creative, thoughtful, and sweet homemade gift.
8. Troubleshooting Rock Candy Problems
Why Isn’t My Candy Crystallizing?
If nothing happens after 2–3 days:
- Solution wasn’t saturated enough.
- Room temperature is too high.
- The stick touched the bottom or moved too much.
Fixing Cloudy Crystals
Cloudiness often results from impurities in sugar or dirty jars. Use filtered water and clean equipment. Skim off foam before pouring the solution into jars.
Too Many Tiny Crystals?
If your candy is gritty or forms loose crystals around the jar rather than the stick, this means the seeding process failed. Re-roll the stick in sugar and start a fresh batch.
9. How to Store and Preserve Rock Candy
Best Storage Practices
Once dried, store rock candy in an airtight container. Keep it in a cool, dry place away from direct sunlight. Proper storage prevents moisture absorption, which can dissolve the crystals.
Shelf Life of Homemade Rock Candy
Homemade rock candy can last up to 12 months if properly stored. However, for best flavor and appearance, consume within 6 months.
| Storage Method | Duration | Notes |
|---|---|---|
| Airtight container | 6–12 mo | Ideal for longevity |
| Refrigerator | Not advised | Causes condensation |
| Open air | 1 week | Crystals may soften |
Reusing Old Rock Candy
Old candy that has softened can be crushed and used as sweeteners in tea or decorative sprinkles on desserts.
FAQs
How to make rock candy easily?
Boil 1 cup of water, then add 2–3 cups of sugar gradually, stirring until it dissolves. Let it cool, pour into jars, insert sugar-dusted sticks, and let crystals grow for 5–7 days. Keep the jars still and covered with a paper towel.
What are the ingredients in candy rocks?
Main ingredients include granulated sugar, water, flavoring extracts (optional), food coloring, and a stick or string for crystals to form on.
Is rock candy healthy?
Not particularly. It’s made of pure sugar and contains around 70–80 grams of sugar per stick. While it has fewer additives than processed candies, it still contributes to high calorie and sugar intake.
What type of solution is needed to make rock candy?
A supersaturated sugar solution—created by dissolving more sugar in hot water than it would normally hold—is required. It’s the foundation for proper crystal formation.
How does a sugar solution become rock candy?
As the supersaturated solution cools and water evaporates, sugar molecules start to form solid structures (crystals) around a stick or string, growing larger over several days.
Conclusion
Homemade rock candy is the perfect mix of fun, flavor, and science. Whether you’re experimenting with your kids or crafting a stunning party favor, this sugary project delivers both satisfaction and sweetness. With the right technique, you can create dazzling sugar crystals in your own kitchen while learning the fascinating science behind them. Remember, a supersaturated solution is key, and patience is your best friend. Now that you know how it all works, it’s time to grab your jars and start crystallizing.
For more recipes follow me on PINTEREST
PrintHomemade Rock Candy – The Sweet Science of Crystallized Candy Magic
A fun and colorful DIY candy experiment made with just sugar and water! This Homemade Rock Candy recipe lets you grow edible sugar crystals on sticks—perfect for science projects, gifts, or sweet party favors. Customize with flavors and colors to match any event theme!
- Prep Time: 30 minutes
- Cook Time: 5–7 days
- Total Time: 5–7 days, 30 minutes
- Yield: 6 rock candy sticks 1x
- Category: candy
- Cuisine: american
Ingredients
-
2 cups granulated sugar
-
1 cup water
-
1/2 teaspoon flavor extract (optional) – e.g., peppermint, lemon, vanilla
-
Food coloring (optional)
-
6 wooden skewers or cotton strings
-
6 mason jars or tall glasses
-
Extra sugar (for coating skewers)
-
Clothespins or clips (to hold skewers in place)
Instructions
-
Boil the Sugar Solution
In a medium saucepan, bring 1 cup of water to a boil. Gradually stir in the 2 cups of sugar until completely dissolved. The mixture should look thick and glossy. -
Add Flavor & Color (Optional)
Remove from heat. Stir in any food coloring or flavor extract you’d like to use. -
Prepare the Skewers
Dip each skewer in the sugar solution, then roll it in dry sugar. Let them dry for 1 hour—this will help crystals form faster. -
Pour Solution into Jars
Carefully pour the sugar solution into each jar. Avoid disturbing the sediment. -
Insert Skewers & Let It Sit
Suspend the sugar-coated skewers in the jars using clothespins to keep them centered. Make sure they don’t touch the sides or bottom. -
Wait & Watch
Cover jars with a paper towel and leave undisturbed for 5–7 days. Crystals will begin to form and grow.
-
Remove & Dry
Once crystals reach your desired size, remove the sticks and let them dry on parchment paper for 1 hour.
Nutrition
- Serving Size: 6 rock candy sticks
- Calories: 250–300
- Sugar: 70–80g
- Fat: 0g
- Carbohydrates: 75g
- Fiber: 0g
- Protein: 0g


